Crispy on the outside, tender on the inside — ciabatta bread offers that unmistakable chew and light, airy crumb that makes it a favorite for everything from paninis to bruschetta. While many assume making artisan bread at home requires sourdough starters or complex techniques, this streamlined version delivers classic results with minimal effort. No kneading, no complicated shaping, just thoughtfully handled dough and a hot oven.
Whether you’re pairing it with olive oil and balsamic or building your dream sandwich, this Italian-inspired loaf is a worthy addition to your baking repertoire. And once you taste it warm from your oven, store-bought loaves just won’t compare.
What Is Ciabatta, and Why Is It Special?
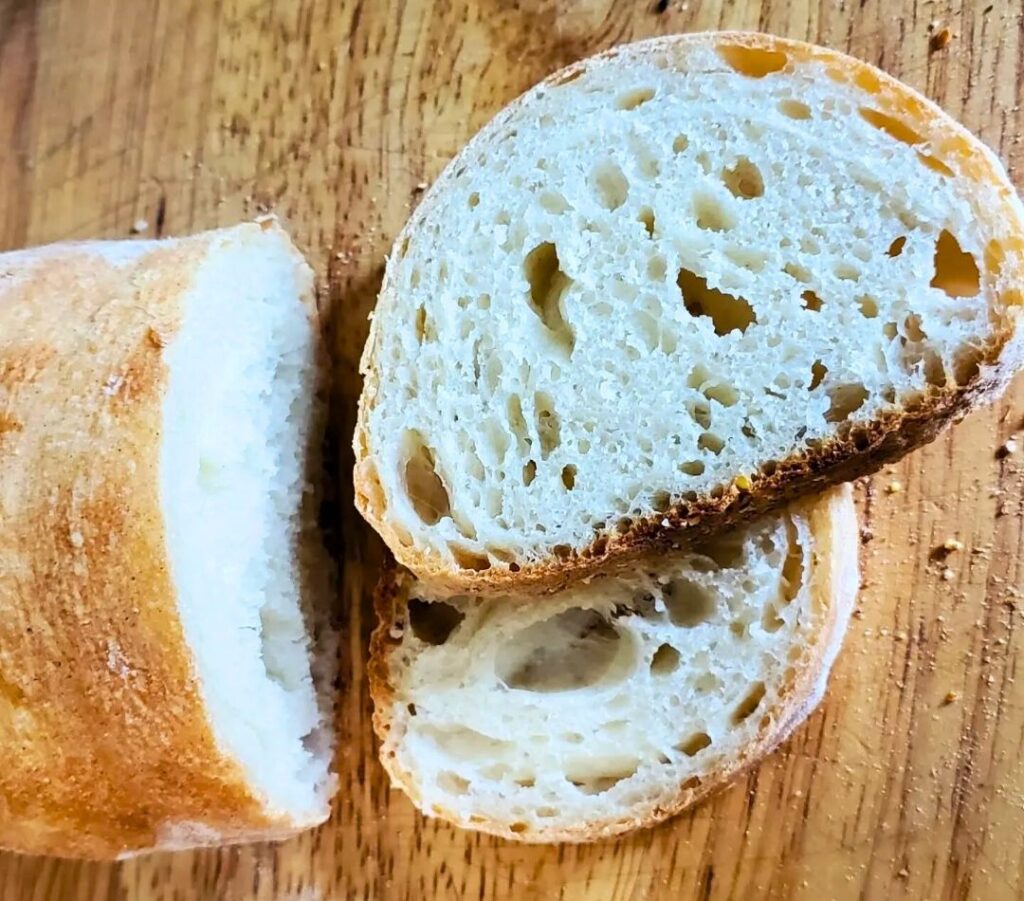
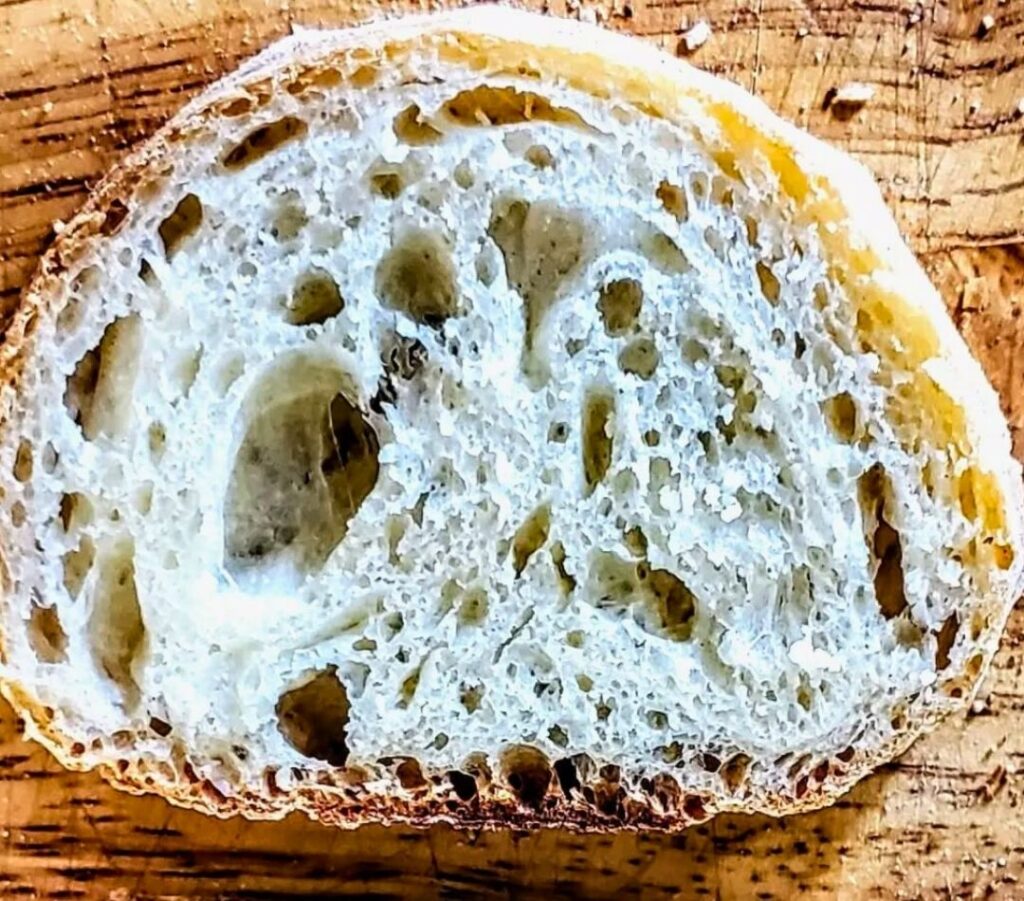
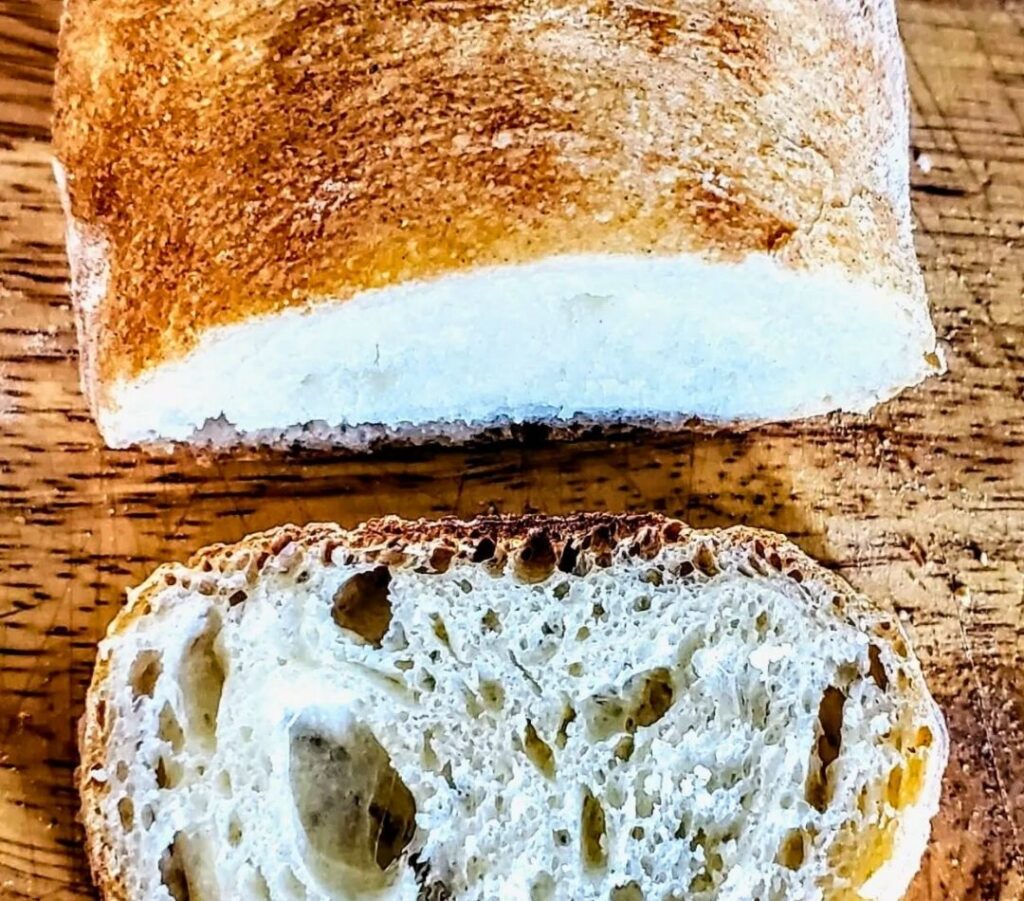
Ciabatta, meaning “slipper” in Italian, refers to the bread’s unique shape—flat, wide, and slightly elongated. Created in the 1980s as a response to French baguettes, this rustic Italian bread is prized for its open crumb, thin crackly crust, and slightly tangy flavor.
Unlike dense sandwich loaves, ciabatta has a high hydration dough (meaning more water than flour), which is what gives it that pillowy interior and crisp exterior. It’s a minimalist bread in terms of ingredients, but when handled properly, it delivers bakery-quality results at home.
Ingredients You’ll Need
The beauty of ciabatta lies in its simplicity. This recipe sticks to four essential ingredients—no butter, milk, or eggs. It’s naturally vegan and dairy-free.
- Bread flour (500g) – Higher protein content is key to developing structure in this wet dough.
- Instant yeast (5g) – A fast and reliable leavening agent for a steady rise.
- Salt (10g) – Enhances flavor and regulates yeast activity.
- Warm water (400ml) – Hydrates the flour and activates the yeast.
Tip: Always weigh your ingredients with a kitchen scale for accuracy, especially in high-hydration doughs like ciabatta.
Step-by-Step: How to Make Ciabatta at Home
This method avoids kneading altogether, relying on rest and folding to build strength in the dough. Here’s how to do it:
1. Mix the Dough
In a large bowl, combine bread flour, salt, and yeast. Add the warm water gradually, stirring with a wooden spoon or dough whisk until you have a shaggy, sticky dough. It will look messy—that’s perfect.
2. Rest & First Rise
Cover the bowl with a damp cloth or plastic wrap and let it sit at room temperature for 1 hour. During this time, gluten starts forming naturally without any kneading.
3. Fold for Strength
After the first rise, wet your hands or a spatula and gently fold the dough over onto itself from the sides, about 3–4 folds. This strengthens the dough and helps create the airy crumb ciabatta is known for.
Cover again and let rest for another 30 minutes.
4. Preheat the Oven
Crank your oven to 450°F (230°C). If you own a baking stone or steel, place it on the middle rack now—it helps simulate a bakery oven floor for an extra crisp crust.
5. Prepare the Baking Surface
Line a baking sheet with parchment and lightly dust with flour or semolina. This prevents sticking and creates a rustic finish on the base.
6. Shape the Loaf
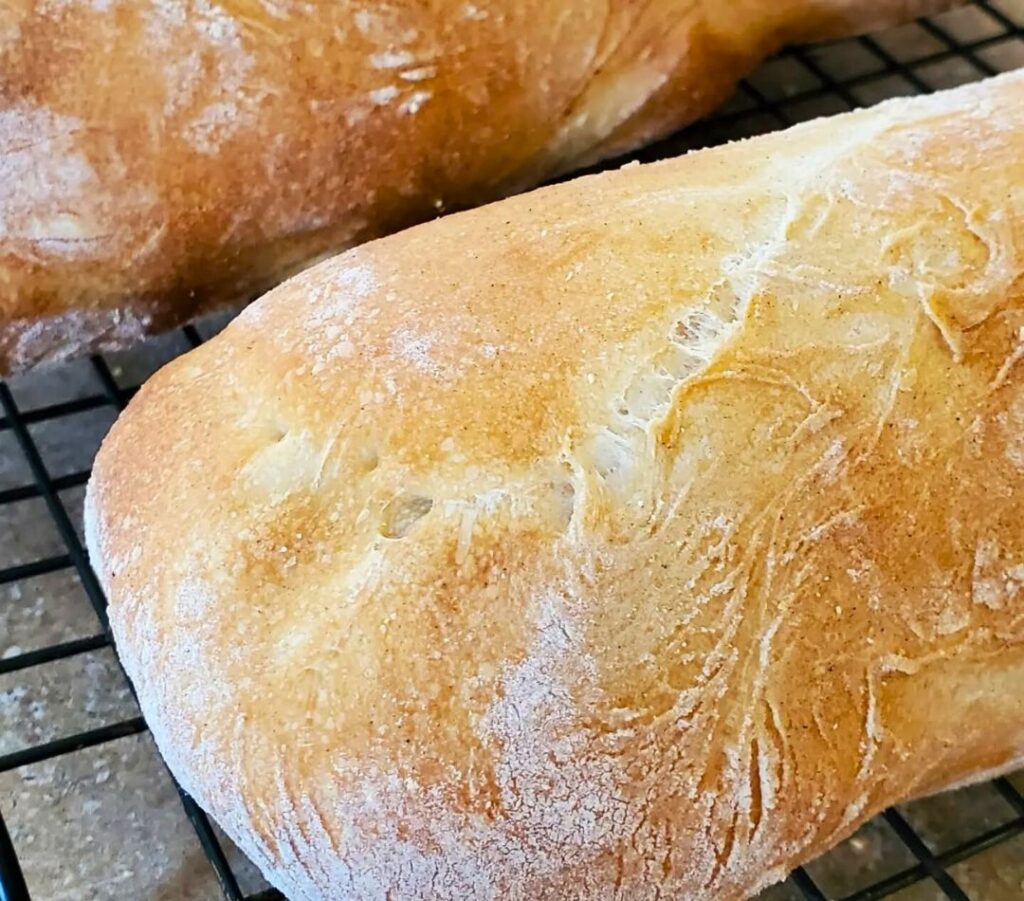
Carefully turn out the dough onto the floured parchment. Avoid deflating it. Shape it loosely into a long, narrow rectangle, mimicking the slipper-like shape ciabatta is known for. Don’t over-handle it—gentleness preserves the air pockets.
7. Bake
Transfer the sheet to your preheated oven. Bake for 25 to 30 minutes, or until the loaf is golden brown and sounds hollow when tapped on the bottom.
If using a baking stone, slide the parchment directly onto it. A quick spritz of water on the oven walls during the first few minutes can enhance the crust by creating steam.
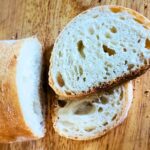
Cooling and Serving
Resist the urge to slice right away. Let the bread cool completely on a wire rack—this allows the interior to finish setting and avoids a gummy texture.
Once cooled, slice with a serrated knife and enjoy it:
- With olive oil and balsamic
- As a base for sandwiches or paninis
- Toasted and topped with tomatoes and herbs for bruschetta
- Dipped in soups and stews
Why This Method Works
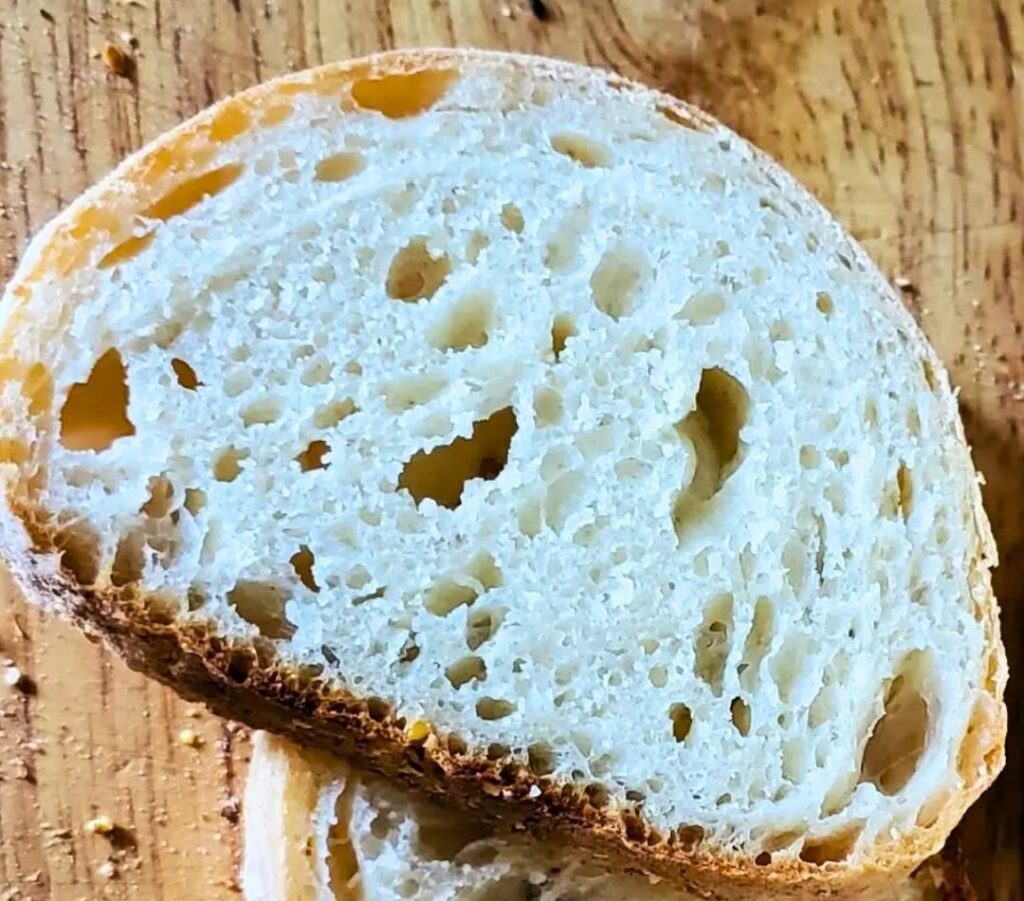
Traditional ciabatta often uses a biga (starter) and longer fermentation, but this simplified version offers a shortcut without compromising texture. The high hydration (80% water-to-flour ratio) creates the signature open crumb, and the folding technique gives enough strength to rise well.
Skipping the kneading makes this recipe accessible even for beginners, while still producing a deeply satisfying loaf.
Tips for Success
- Use bread flour, not all-purpose. You need the higher protein to handle the water content.
- Avoid adding extra flour. This dough is meant to be wet—trust the process.
- Be gentle when shaping. Don’t punch down or knead. Preserve those air pockets.
- Steam your oven by placing a pan of water on the bottom rack, or misting the walls during the first 5 minutes. This gives you a thinner, crisper crust.
- Let it cool. Even if it smells amazing, cutting too soon can ruin the interior texture.
Storage and Freezing
Ciabatta is best the day it’s baked, but leftovers keep well:
- Room Temperature: Wrap in a clean kitchen towel or paper bag. Use within 2 days.
- Freezing: Slice the loaf, then freeze in a zip-top bag. Toast slices directly from frozen when needed.
- Avoid plastic bags, which soften the crust.
Variations to Try
- Add rosemary or roasted garlic to the dough for a fragrant twist.
- Swap some of the water for milk or olive oil for a richer, softer version.
- Shape into mini ciabatta rolls for sandwiches or sliders.
- Use leftover slices for ciabatta French toast or croutons.
Final Thoughts
This no-knead ciabatta recipe makes artisan bread approachable, even for first-time bakers. With minimal hands-on time and a bit of resting, you’ll have a crackly-crusted, chewy-centered loaf that outshines store-bought options in both taste and texture.
Try it once, and you might just find yourself baking it on repeat—for weekend brunch, cozy soups, or that perfect sandwich.
Let your oven bring the aroma of fresh bread into your home, one loaf at a time.
Artisan Ciabatta Bread with Crispy Crust and Chewy Interior
Description
Ingredients
Main Ingredients
- 500 g bread flour
- 10 g salt
- 5 g instant yeast
- 400 ml warm water approximately 100°F (38°C)
Instructions
Preparation and Baking
- In a large mixing bowl, combine bread flour, salt, and instant yeast. Gradually add warm water and stir until a sticky, shaggy dough forms.
- Cover the bowl with a damp cloth or plastic wrap and let the dough rest at room temperature for 1 hour to begin gluten development.
- After the first rest, gently fold the dough over itself 3-4 times using wet hands or a spatula to strengthen the gluten network.
- Cover the dough again and allow it to rest for an additional 30 minutes.
- Preheat the oven to 450°F (230°C). If available, place a baking stone inside to heat as well.
- Line a baking sheet with parchment paper and dust it lightly with flour or semolina.
- Carefully transfer the dough onto the prepared baking sheet, shaping it gently into a long, narrow loaf without deflating the air pockets.
- Bake for 25-30 minutes until the loaf is golden brown and sounds hollow when tapped on the bottom.
- Remove the bread from the oven and cool completely on a wire rack before slicing.
Notes
- Use bread flour for better gluten development and texture.
- Do not add extra flour to the dough; a sticky texture is expected.
- Let the bread cool fully before slicing to ensure proper crumb setting.
- Optional: For a crisper crust, create steam in the oven by misting water or placing a pan of water inside during baking.
Leave a Reply