

The chocolate bar hidden inside these French milk bread rolls is the whole point — and the reason you’ll bake them again and again.
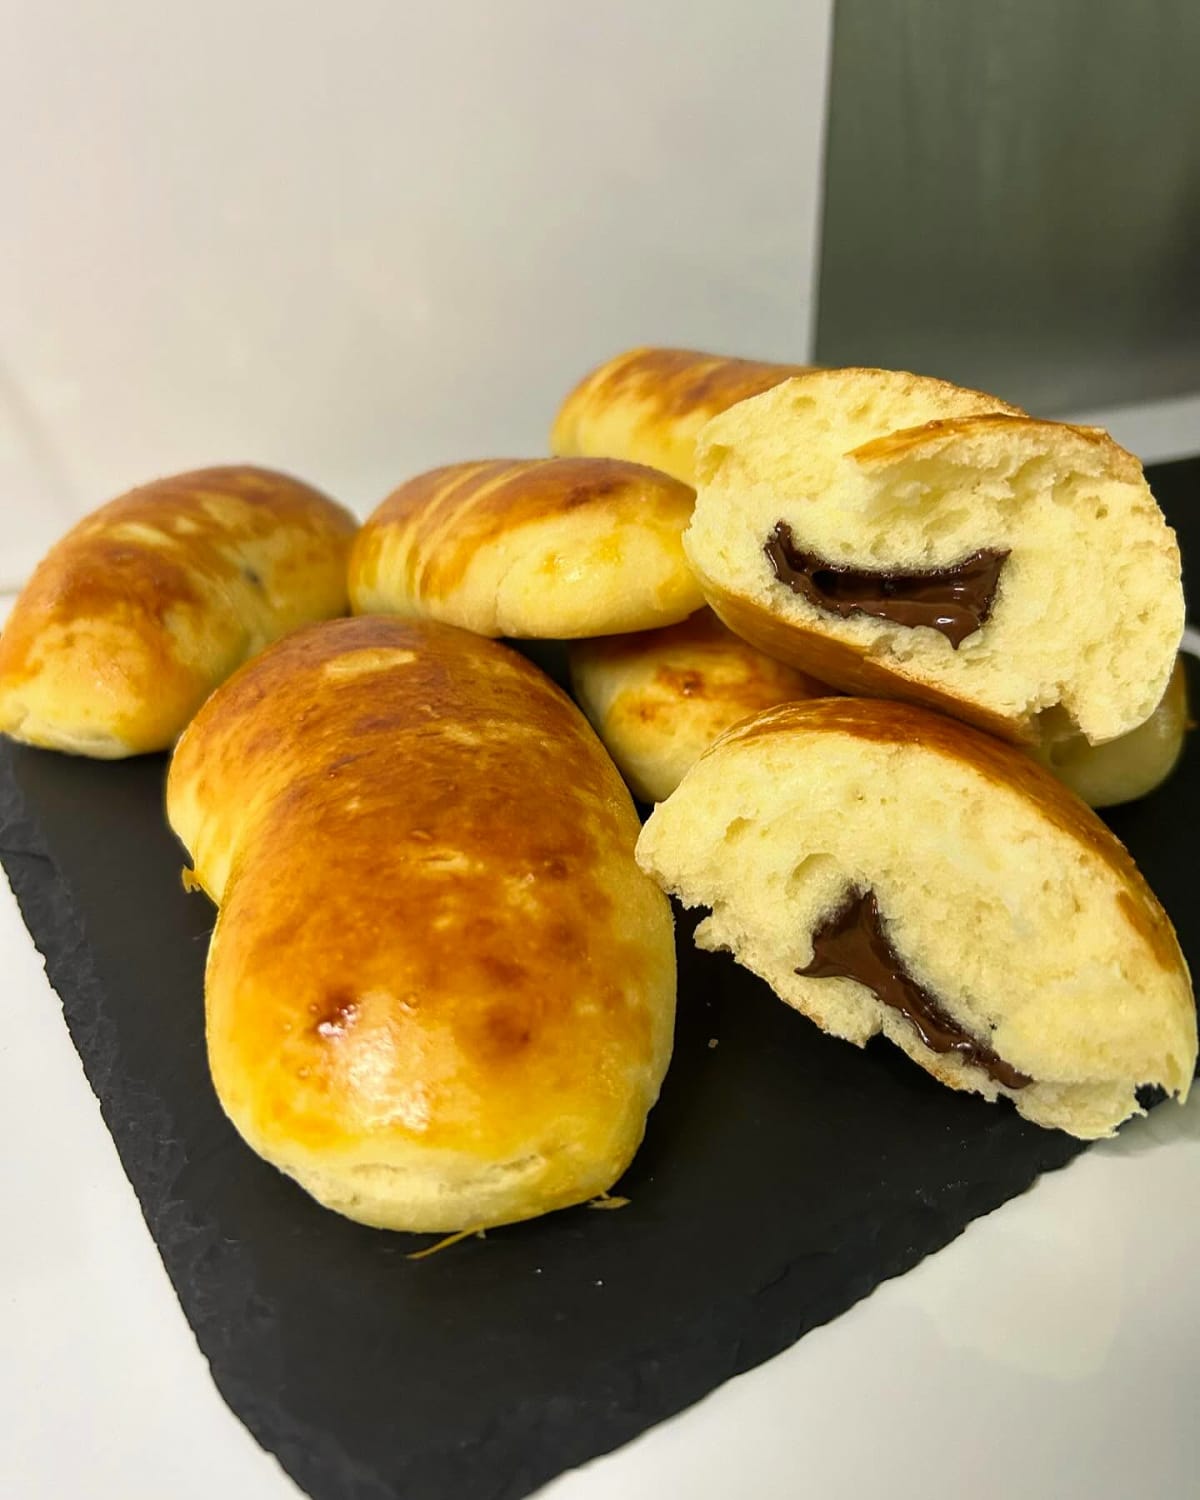
There is a particular kind of happiness that comes from tearing open a warm, soft roll and finding a river of melted chocolate waiting inside. These chocolate-stuffed French milk bread rolls deliver exactly that.
The dough itself is gorgeous — enriched with warm milk, sugar, and a touch of oil until it turns pillowy and tender — but it’s the stick of good chocolate tucked in the center that turns an ordinary breakfast roll into something genuinely special.
I love this recipe because it looks far more impressive than it actually is. The shaping technique — rolling the dough around a chocolate stick with a little fan of cuts along one edge — sounds fussy in words and takes about thirty seconds in practice.
And the payoff is a bakery-style spiral roll with a golden, glossy top and a chocolate core that oozes when the bread is still warm. These are perfect for a slow weekend breakfast, a packed lunchbox surprise, or an afternoon coffee break.
If you already love my chocolate cinnamon rolls, this is the simpler, silkier French cousin worth knowing.
What is French Milk Bread (Pain au Lait)?
French milk bread — pain au lait — is a classic enriched roll that you’ll find in every neighborhood boulangerie in France. Unlike a rustic country loaf, pain au lait is soft, slightly sweet, and almost brioche-like without the heavy butter.
The dough gets its tenderness from milk and a modest amount of oil rather than from eggs and butter, which keeps the crumb light and moist for days.
It’s the kind of bread that kids love and adults quietly eat three of. Traditionally it’s shaped into small pointed rolls, but the dough is wonderfully forgiving, which makes it ideal for stuffing and shaping however you like.
The milk in the dough also gives it a gentle sweetness and that beautifully golden crust when brushed with egg before baking.
Why Warm Milk and Yeast Matter for This Dough
The single most important step in this recipe happens before you’ve mixed a single flour grain: dissolving the yeast in warm milk and giving it about ten minutes to bloom. Warm milk (not hot — think comfortably warm to the touch) wakes up the yeast and gives it a head start.
You should see the surface turn foamy and slightly bubbly. If it doesn’t, your yeast is likely past its prime, and your rolls will be flat and dense no matter what else you do.
The milk also does double duty as the hydration and enrichment for the dough. It keeps the crumb supple and gives the bread its signature tender bite.
And because this dough also contains sugar and oil, it stays soft even after it cools — unlike lean breads that toughen as they rest. This is one of the reasons I reach for this dough when I want something that still feels luscious hours later.
How to Shape Chocolate-Stuffed Rolls (The Easy Way)
Shaping these rolls is genuinely fun once you’ve done it once. Here’s the idea: you roll each dough ball out flat, lay a stick of chocolate along one end, then use a knife or bench scraper to cut a series of parallel slits in the opposite end of the dough — cutting through but leaving a little bridge of dough at the very tip so the strips stay attached.
When you roll the dough up from the chocolate end, those cut strips fan out across the top and create a gorgeous ribbed pattern.
A few things help enormously:
- Use a sharp knife or a pizza cutter so the cuts are clean rather than ragged.
- Don’t cut all the way through to the edge of the dough — leave about a centimeter intact so the roll holds together.
- Keep the chocolate stick slightly off-center so it’s fully wrapped on the first turn and won’t leak out the bottom during baking.
- Work with a lightly floured surface so the dough doesn’t stick as you roll.
After shaping, the rolls need a second rise on the baking sheet. This rest is what makes the difference between a dense roll and an airy, bakery-worthy one.
Don’t skip it.
What Kind of Chocolate Works Best for Stuffed Rolls?
Reach for a good-quality chocolate bar rather than chocolate chips. Chips are formulated to hold their shape in the oven, which means they stay stubbornly solid inside your roll.
A proper bar — dark, milk, or even a blend — melts into that luxurious, gooey center we’re after.
Break the bar into sticks roughly the length of the rolled-out dough. I like a 55–60% dark chocolate for the contrast against the sweet dough, but milk chocolate makes these taste like the best hot cross bun hybrid imaginable.
Whatever you choose, the quality matters here because there’s nowhere for mediocre chocolate to hide.
How to Get That Perfect Golden Finish
That gorgeous, shiny bakery crust comes from an egg yolk glaze. The recipe conveniently splits one egg — the white goes into the dough for structure and tenderness, and the yolk is whisked with a little milk and brushed over the shaped rolls just before they go in the oven.
Two glazing tips make a real difference. First, use a soft pastry brush and apply the glaze gently so you don’t deflate the puffed-up rolls.
Second, set a timer for about 15 minutes and start watching. These rolls go from perfectly golden to overdone surprisingly fast, and ovens vary enormously.
Pull them the moment the tops look burnished and deep gold. They’ll continue to firm up slightly as they cool.
Can I Make These Rolls Ahead of Time?
Yes, and this recipe is wonderfully flexible for planning ahead. The simplest make-ahead method is to prepare and shape the rolls, place them on the baking sheet, cover them tightly, and refrigerate overnight.
In the morning, let them come to room temperature and finish their rise for about 30 to 45 minutes, then glaze and bake. Fresh warm rolls with minimal morning effort.
You can also bake the rolls fully and store them in an airtight container at room temperature for up to two days. Reheat them in a low oven (about 150°C / 300°F) for five minutes to bring back the softness and re-melt the chocolate center.
They freeze well too — just thaw at room temperature and warm before serving.
Serving Ideas for Chocolate Milk Bread Rolls
These rolls are wonderful served warm, ideally within an hour of baking so the chocolate is still molten. They need absolutely nothing else, but a few things make them even better alongside a cup of coffee or tea:

- A light dusting of powdered sugar once they’ve cooled slightly.
- A smear of salted butter on the side for anyone who wants extra richness.
- Fresh berries or sliced strawberries to cut through the sweetness.
For a weekend breakfast spread, these sit beautifully next to something savory or a simple loaf like my no-knead cranberry walnut bread. And if you’re baking for a crowd and want to keep the chocolate theme going, a tray of baked chocolate glazed donuts alongside these rolls makes the table look like a real French pâtisserie.
Troubleshooting: Common Mistakes to Avoid
My dough didn’t rise. What went wrong?
Almost always, it’s the yeast. Either the milk was too hot and killed it, or the yeast was old and inactive.
The ten-minute bloom step is your early warning system — use it. Also make sure the dough rises in a warm, draft-free spot.
Covering it with both plastic wrap and a cloth helps hold the warmth in.
The chocolate leaked out during baking.
This happens when the chocolate stick sits too close to the edge of the dough or when the dough isn’t sealed well at the end of the roll. Place the chocolate slightly inward from the edge and make sure the final turn of dough fully wraps around it.
Pinch the seam gently to seal.
The rolls are dense instead of fluffy.
Usually this means the second rise was cut short. Those shaped rolls need a full 30 minutes on the baking sheet before baking — the dough should look visibly puffy and feel airy to the touch.
Under-proofed rolls will always bake up tight and heavy.
The tops browned too fast.
Every oven runs differently. If you know yours runs hot, lower the temperature by about 10°C and check the rolls a few minutes early.
You can also tent them loosely with foil for the last few minutes if the color is getting ahead of the interior doneness. Watch closely — the line between golden and too dark is thin.
Once you’ve made these once, they’ll absolutely earn a permanent spot in your baking rotation. The dough is simple, the shaping is satisfying, and that moment of pulling apart a warm roll to find the melted chocolate inside never gets old.
Happy baking!
Chocolate-Stuffed French Milk Bread Rolls
Description
Ingredients
- 250 ml warm milk
- 1 packet dry yeast about 7g
- 500 g all-purpose flour
- 80 g granulated sugar
- 1 packet vanilla sugar about 8g
- 1 egg white for dough, yolk for glaze
- 1 tbsp milk for glaze
- 80 ml neutral oil
- 1 bar chocolate bar broken into sticks
Instructions
- Dissolve the yeast in the warm milk and let it rest for 10 minutes.
- Mix together the sugar, vanilla sugar, flour, egg white, and oil.
- Add the milk-yeast mixture and begin kneading the dough.
- Form a ball, cover with plastic wrap and a cloth, and let the dough rest for 1 hour.
- Flour your work surface and gently deflate the dough.
- Shape the dough into about 10 small, round balls.
- Roll each ball out with a rolling pin, place a chocolate stick at one end, and make cuts along the opposite end without reaching the tip.
- Roll the dough around the chocolate from one end to the other.
- Place the rolls on a baking sheet lined with parchment paper, cover with a cloth, and let them rise for 30 minutes.
- Brush each roll with the egg yolk mixed with a little milk.
- Bake in a preheated oven at 180°C (350°F) for about 20 minutes, watching carefully until golden brown.
Notes
- Letting the yeast bloom in warm milk first ensures the dough rises properly.
- Watch the rolls closely during baking — they can go from golden to overdone quickly.
- Use a good-quality chocolate bar for the best melted result inside each roll.
Leave a Reply