
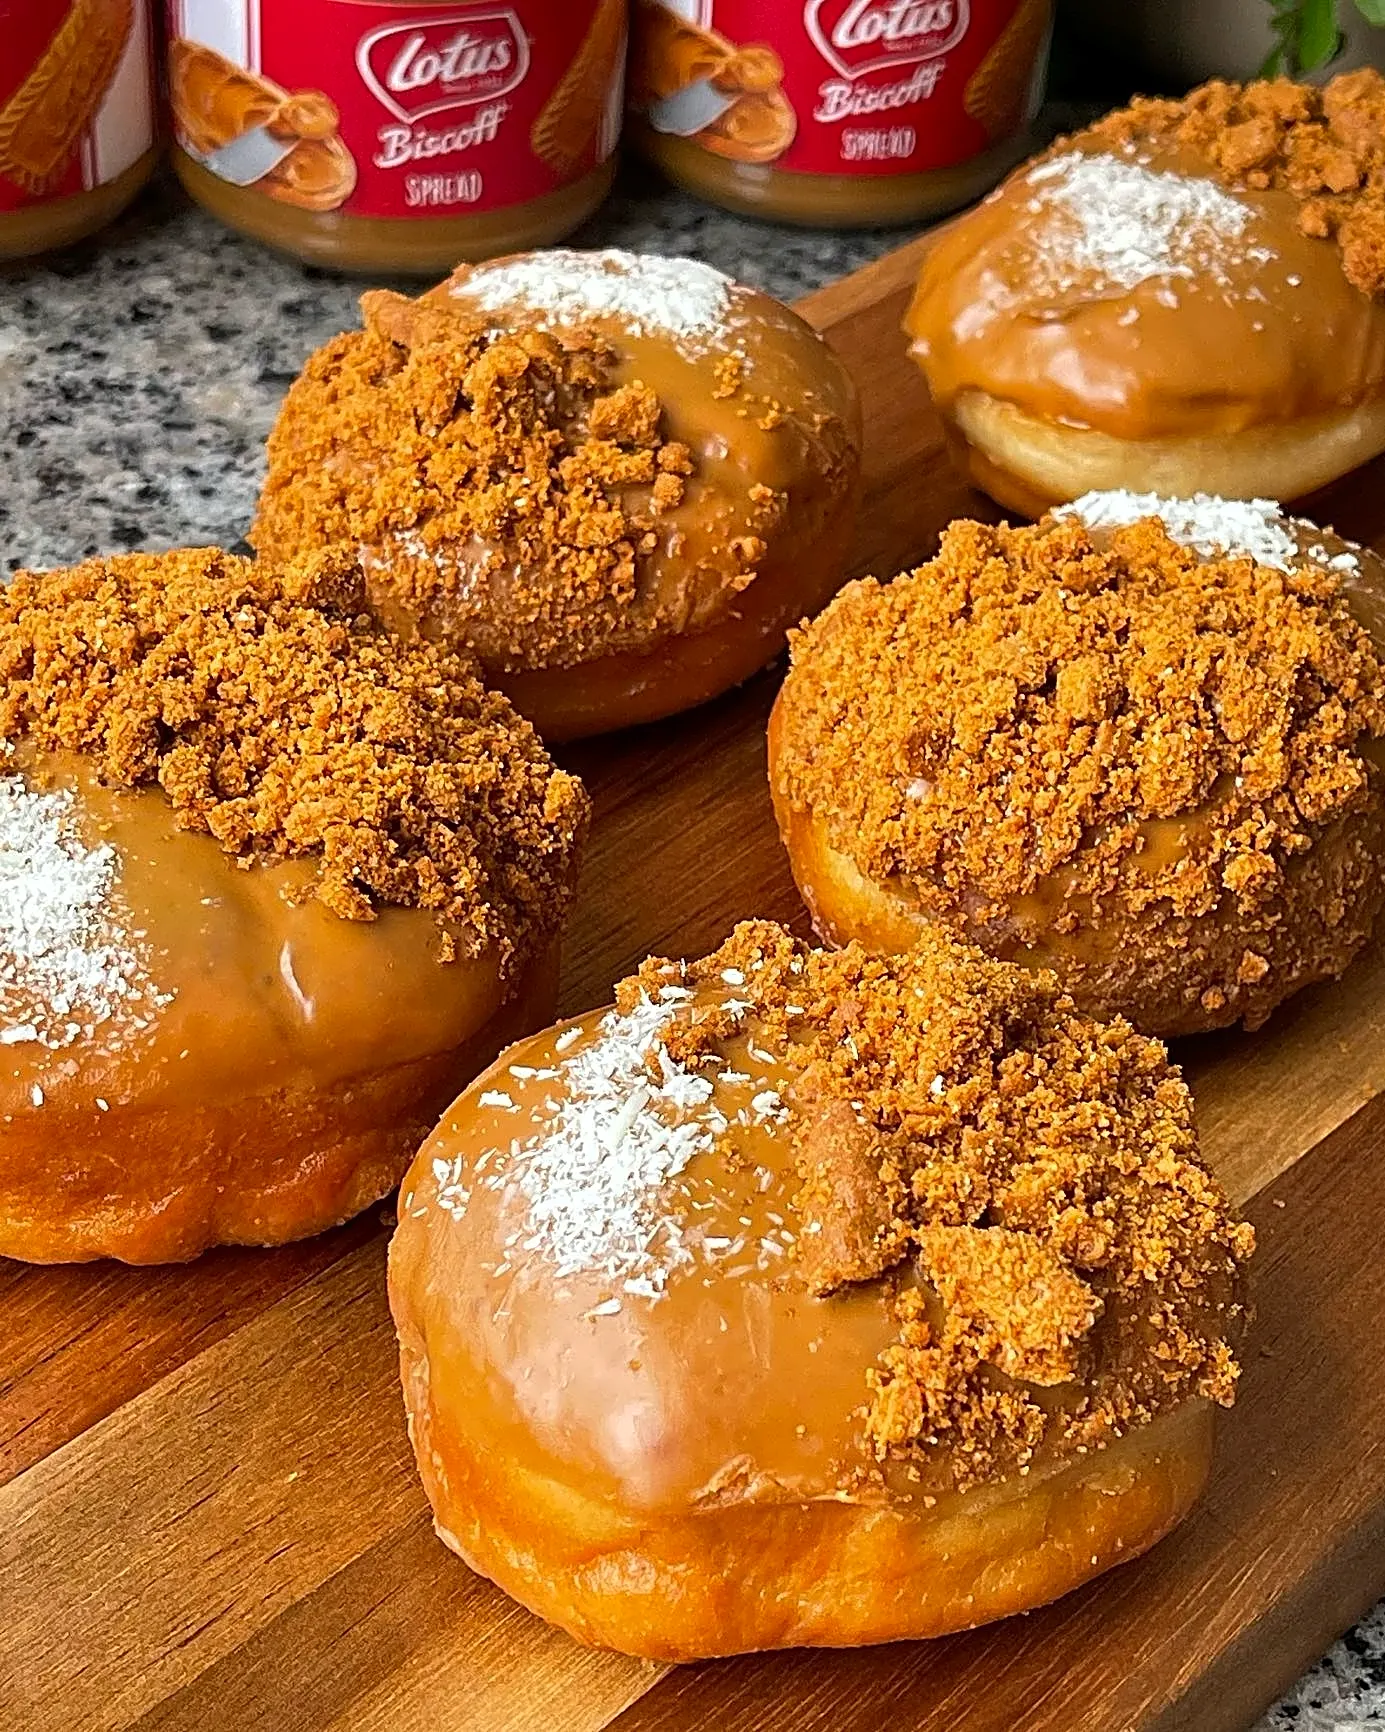
Bakery-level Biscoff donuts, made at home.
Okay, I know that’s a bold statement — but hear me out. I’ve tried my fair share of Biscoff donuts from fancy bakeries and coffee shops, and I’m telling you, this recipe blows them all out of the water.
We’re talking pillowy-soft yeast dough that practically melts on your tongue, stuffed with a luscious creamy Biscoff filling, then dipped in a glossy Biscoff glaze and showered with crushed cookie pieces. It’s the kind of donut that makes people’s eyes go wide after the first bite.
Now, I won’t sugarcoat it (pun absolutely intended) — these take a bit of patience. You’re looking at around two and a half hours of prep time, mostly because the dough needs to rise properly.
But the actual hands-on work is surprisingly simple, and the payoff is absolutely enormous. If you’ve made things like my cinnamon sugar Berliner doughnuts before, you already know the drill with yeast doughs.
This one follows a very similar process, just with that irresistible Biscoff twist.
I love making these for weekend brunches, birthday mornings, or honestly any time I want to see my family lose their minds with excitement. There’s something about pulling a tray of golden, freshly fried donuts out of the kitchen that just fills the whole house with joy.
Trust me — once you’ve made these from scratch, you’ll never look at store-bought donuts the same way again.
Why You’ll Love These Homemade Biscoff Donuts
Let me count the ways. First, the dough itself is incredible — soft, slightly sweet, with just a hint of nutmeg that gives it that classic donut-shop flavor.
It fries up beautifully with a gorgeous golden exterior and a cloud-like interior. Second, the Biscoff filling is pure indulgence.
I’ve included two filling options in the recipe card below, so you can go with a thick custard-style filling or a lighter whipped cream version depending on your mood. Both are absolutely divine.
Third — and this is the part that really takes things over the top — the glaze and toppings. A generous dip into melted Biscoff spread gives each donut that signature caramelized cookie butter flavor, and the crushed Biscoff biscuits on top add the most satisfying crunch.
A few white chocolate flakes scattered over everything and you’ve got yourself something that looks like it came straight out of a professional bakery window.
What Is Biscoff Spread and Why Is It So Addictive?
If you haven’t yet fallen down the Biscoff rabbit hole, welcome — you’re going to love it here. Biscoff spread (also called cookie butter) is made from crushed Lotus Biscoff biscuits blended into a smooth, creamy paste.
It tastes like caramelized gingerbread meets brown sugar meets the best cookie you’ve ever had. It’s nut-free, spreadable, and dangerously easy to eat straight from the jar with a spoon.
Not that I’ve done that. More than once.
In this recipe, Biscoff spread shows up in three glorious ways: folded into the filling, melted down for the glaze, and crushed as a topping. Every single element reinforces that warm, spiced, caramelized flavor that makes Biscoff so beloved.

If you enjoyed how I used Biscoff in my chocolate cream Biscoff cake, you’ll absolutely love this donut version.
Two Filling Options: Custard or Whipped Cream?
I wanted to give you flexibility here because honestly, both fillings are fantastic — they just deliver different experiences.
The custard-style filling combines thick custard with Biscoff spread and cornflour for a rich, velvety center that holds its shape beautifully inside the donut. It’s indulgent and satisfying, almost like a pastry cream with a cookie butter twist.
This is my go-to when I want something that feels really substantial and bakery-worthy.
The whipped cream filling is lighter and airier — double cream whipped up with Biscoff spread and a touch of icing sugar. It’s billowy, almost mousse-like, and pairs gorgeously with the fried dough.
I reach for this version on warmer days or when I want the donut to feel a little less heavy. You really can’t go wrong either way, so pick whichever speaks to your cravings.
Tips for Frying Donuts at Home
Frying at home can feel intimidating, but it’s honestly one of those things that gets easier every single time. The biggest key here is oil temperature.
You want your oil sitting right around 160°C (320°F) — hot enough to get that beautiful golden color, but not so hot that the outside burns before the inside cooks through. I use a kitchen thermometer and check it between every batch.
It makes a world of difference.
Only fry three or four donuts at a time so you don’t overcrowd the pot and drop the oil temperature. Each side needs just a couple of minutes.
You’ll know they’re ready when they’re a deep, even golden brown all over. Transfer them straight to a wire rack to drain — paper towels work in a pinch, but a rack keeps them crispier on the bottom.
One thing I always do is test-fry a single donut first. It lets me check the temperature and timing before committing the whole batch.
If it browns too fast, I lower the heat. If it takes forever, I bump it up.
That one sacrificial donut is worth its weight in gold.
How to Fill and Glaze the Donuts Like a Pro
Once your donuts have cooled just enough to handle, grab a skewer or chopstick and poke a hole into the side of each one. Wiggle it around gently to create a little pocket inside — you’re basically hollowing out just enough space for that glorious filling.
Don’t go too crazy or you’ll tear the donut apart; a modest cavity is all you need.

Load your filling into a piping bag fitted with a round nozzle, then pipe it into each donut until you feel it start to resist. You’ll get a feel for the right amount after the first couple — it’s honestly so satisfying watching that filling disappear into the dough.
For the glaze, simply melt your Biscoff spread until it’s smooth and pourable, then dip the top of each filled donut right into it. The glaze sets into this gorgeous, slightly sticky coating that holds the crushed biscuit pieces perfectly.
Sprinkle those on immediately along with the white chocolate flakes before the glaze firms up. If you’re a fan of dressed-up donuts, you’ll also love my colorful chocolate chip donuts for another fun variation.
Can You Make the Dough Ahead of Time?
Absolutely, and it’s actually a great strategy if you want fresh donuts in the morning without waking up at dawn. After the first rise, punch the dough down gently, wrap it tightly in plastic wrap, and pop it in the fridge overnight.
The cold slows the yeast down, so the dough develops even more flavor as it sits — a slow, cold ferment is a baker’s secret weapon.
The next morning, pull the dough out and let it come to room temperature for about 30 minutes before rolling and cutting. Then just continue with the second rise, frying, filling, and glazing as usual.
Fresh, warm, Biscoff-filled donuts for breakfast with minimal morning effort. You’re welcome.
Storing and Reheating Your Donuts
These donuts are undeniably at their absolute best within the first few hours of being made — that contrast between the warm, fluffy dough and the cool, creamy filling is pure magic. But life happens, and if you have leftovers, they’ll keep in an airtight container at room temperature for about a day.
The glaze might lose a tiny bit of its shine, but the flavor stays fantastic.
I wouldn’t recommend refrigerating them, as the cold tends to dry out fried dough and make it dense. If you really need to store them longer, you can freeze the unglazed, unfilled donuts for up to a month.
Thaw them at room temperature, warm them gently in the oven, then fill and glaze fresh. It’s a little extra work, but it means you can have donut-shop-quality treats anytime the craving strikes.
And let’s be honest — once you’ve tasted these homemade Biscoff donuts, that craving is going to strike often.
Homemade Biscoff Filled Glazed Donuts Recipe
Description
Ingredients
For the Dough
- 290 g plain flour
- 40 g granulated sugar
- 0.25 tsp nutmeg
- 0.5 tsp salt
- 118 mL warm milk
- 40 g melted butter
- 7 g active dry yeast
- 1 egg
- to taste vegetable oil for frying
For the Filling Option 1
- 100 g custard
- 60 g Biscoff spread
- 3 tbsp cornflour
For the Filling Option 2
- 400 mL double cream
- 4 tbsp Biscoff spread
- 1 tbsp icing sugar
For Decoration
- to taste melted Biscoff spread
- to taste crushed Biscoff biscuits
- to taste white chocolate flakes
Instructions
Dough Preparation
- In a measuring cup, stir together the milk, butter, yeast, and egg.
- In a mixing bowl, combine the flour, sugar, nutmeg, and salt.
- Pour the yeast mixture into the dry ingredients and mix using a stand mixer with a hook attachment. Start on low speed and increase to high for 3 minutes.
- If kneading by hand, knead for 10 minutes until a smooth, soft, and slightly sticky dough forms.
- Transfer to a greased bowl, cover, and let rise in a warm area for 2 hours.
- Once the dough has doubled in size, roll it out onto a floured surface to roughly half an inch thick.
- Use a large cookie cutter to cut out 3-4 inch diameter circles. Cover and let rise for another 30 minutes.
Filling and Frying
- While the dough is proofing, prepare your chosen filling by mixing the respective ingredients together.
- Preheat the frying oil to approximately 160 degrees C.
- Fry 3-4 donuts at a time for a couple of minutes on each side until golden brown.
- Transfer to a wire rack to cool slightly.
- Use a skewer to puncture a hole in the side of each donut and hollow it out slightly.
- Fill a piping bag with a round nozzle and pipe the filling into each donut.
- Dip the filled donuts into melted Biscoff spread and top with crushed Biscoff biscuits and white chocolate flakes.
Notes
- Ensure the oil temperature stays consistent for an even fry.
- The dough is naturally sticky, so use enough flour on your surface when rolling to prevent sticking.
Leave a Reply